How To Build An Outdoor Kitchen – A Practical Terrace
We all have in mind the image of the countryside outdoor kitchen, that space under a makeshift roof where grandma used to cook delicious natural food, especially oven baked pies. During the hot summer days, an outdoor kitchen in the shade is the best option from many points of view. Nature intensifies senses and food is tastier in the end while the space enables family socialization. If you’re planning on building an outdoor kitchen, follow these steps in the article below, as seen on Thisoldhouse.com
Since it is, generally, a seasonal space, there is no need to make huge investments into complex structures, so keep it minimal as long as it answers your basic needs. The first step in building the outdoor kitchen is building the wooden frame that will later support the rest of the structure, as the images below show. Use wood boards to build the frame, one for each appliance or cabinet, keeping in mind the size of the kitchen appliances you are going to use. Wherever you will have cabinets, put a board for support in the middle of the bottom framing.
The next step is screwing the three boxes together side by side to sheath the frame. Flip the frame over and screw a metal post standoff to the bottom of each post to act as feet. For the cabinets, create boxes out of plywood to fit within the depth of the framing. Cover all the plywood with builder’s felt and staple it in place using a staple gun. Work from the bottom up and overlap the sheets of felt by a couple of inches to make sure water can’t get behind them. The next step is nailing a wire lath to the plywood, making sure you hit the framing as much as you can. Overlap the pieces of lath at seams by a couple of inches.
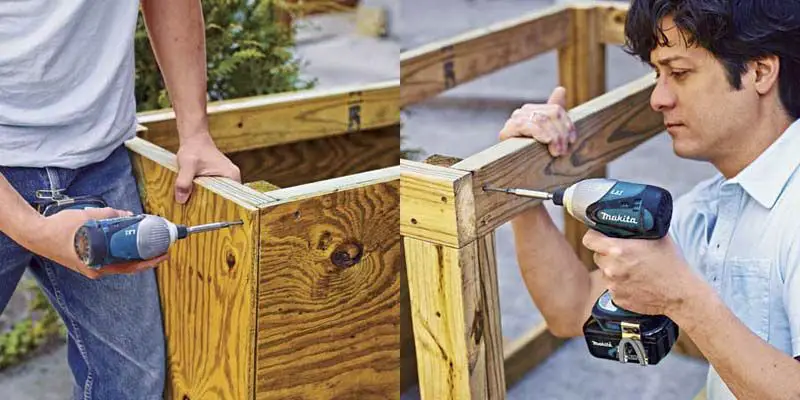
How to build an outdoor kitchen – the wood frame
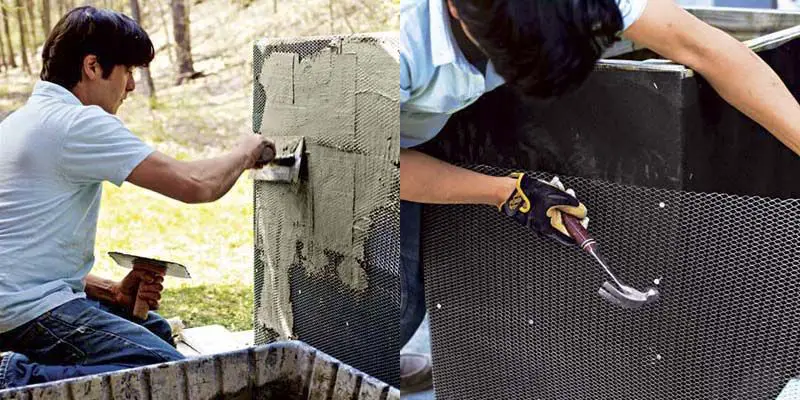
How to build an outdoor kitchen – the wire lath
Cover the wire lath with mortar, pushing it into the crevices in a downward motion. When you are finished, you should not be able to see any mesh. Let the mortar coating cure for about an hour. When it is firm to the touch, use a notched trowel to score the surface horizontally. These grooves will fix the stones on the final external decorative layer which is the next step in building the outdoor kitchen. Lay the stones in both directions from the corner, trimming the large stones if necessary. Fill all the spaces until the whole surface is uniformly covered.
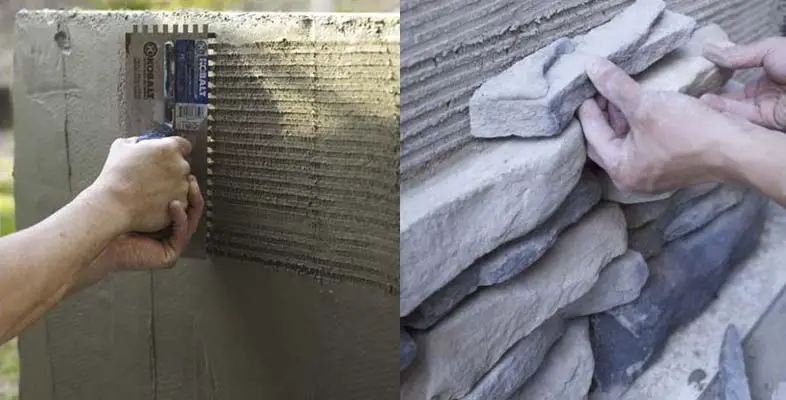
How to build an outdoor kitchen – score the mortar to fix the stones
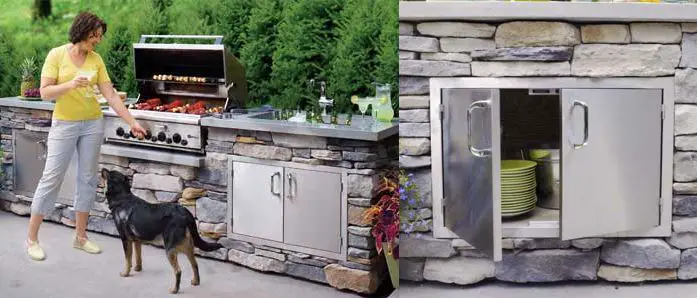
How to build an outdoor kitchen – install the fixtures and it’s all done

