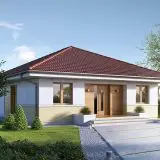
Polystyrene Insulation For Your Home Step by Step
Polystyrene is still the most sought after insulation material because of its low price and its good insulating qualities. An exterior insulation with polystyrene can be a simple solution for your home. Here’s how to install an effective polystyrene insulation step by step.
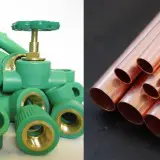
You’ll find a large array of polystyrene products on the market. There are two types of polystyrene foam: expanded or extruded polystyrene.
Expanded polystyrene, used for wall insulation, has the advantage of allowing the wall “breathing” or vapor eviction, preventing dampness and mold forming.
Extruded polystyrene is recommended rather for insulating the foundation (both on the inside and on the outside), the basement walls or caps, because it’s more resistant, denser and stands weight better. On the other hand, it doesn’t allow “breathing” and vapor eviction, so the humidity stays between the wall and the insulation, and that can lead to dampness and mold.
This is how you install polystyrene insulation in eight steps:
- Prepare the surface, dusting and washing it. It has to completely dry before you start insulating.
- Apply ready-made mortar on the foam piece, in lines.
- Place the piece on the wall, starting from the corner, in a straight line. Make sure the piece is well fixed on the wall, before you take your hand off it.
- After you cover the whole wall, fix the pieces in screws (they will be hidden in the wall).
- Apply the fixing mortar, then the armoring net, then another layer of protective mortar.
- Install the corner pieces and net.
- Make the surface even with another layer of mortar.
- When it dries up, you can paint the wall.
Text and photo credits: izolatiacasei.ro