Installing A Hardwood Floor – A Brief Practical Guide
A change at home can always starts with new floors that will bring a fresh look in the overall décor. Wood is a warm and friendly material and its presence will dramatically change the feel in a room, making it more friendly and open. Installing a hardwood floor is not a too difficult process and, by observing a few elementary rules, the change you have in mind can be a successful one. Here is more below on installing a hardwood floor.
It is recommended you install the new floor when the whole renovation process in a room is finished and the paint on the walls is completely dry. Experts say it is ideal minimum 60 days have passed since redecoration works finished before installing the floor. At the same time, heating and ventilation systems should be operational, with a constant 15-16 degrees C and a 30 to 50 % humidity inside for about five days before works begin. Store the wooden boards inside the room for the same period for the material to get acclimatized.
A very important aspect in this whole process is the support surface of the flooring which can be a cement or wooden structure screed. In any case, the support surface has to be dry or else the wood boards risk bending and gaps between the boards will appear. If we install on a cement screed, then the recommended relative moisture should not exceed 2 %, while in the case of wooden structure it shouldn’t go beyond 12 %. Moreover, the support surface has to be smooth and flat, with an at most 2 mm/1.5 linear meters digression admitted. The screed has to also be clean, with no dust, paint, oil or other waste on it.
If the floor is either finished hardwood or engineered wood, experts recommend laying it on an elastic surface and joining the wood elements by using special glue inserted in the “nut” part of the “nut-feder” joint. If the floor boards are to be joined by a “click” system, then no adhesive is required. If you want to install an unfinished hardwood floor then go for either adhesive or flooring nails. In this last case, the installation may be followed by various finishing works, such as puttying, polishing and cleaning. Applying 2-3 layers of varnish is also recommended for a final aesthetic look.
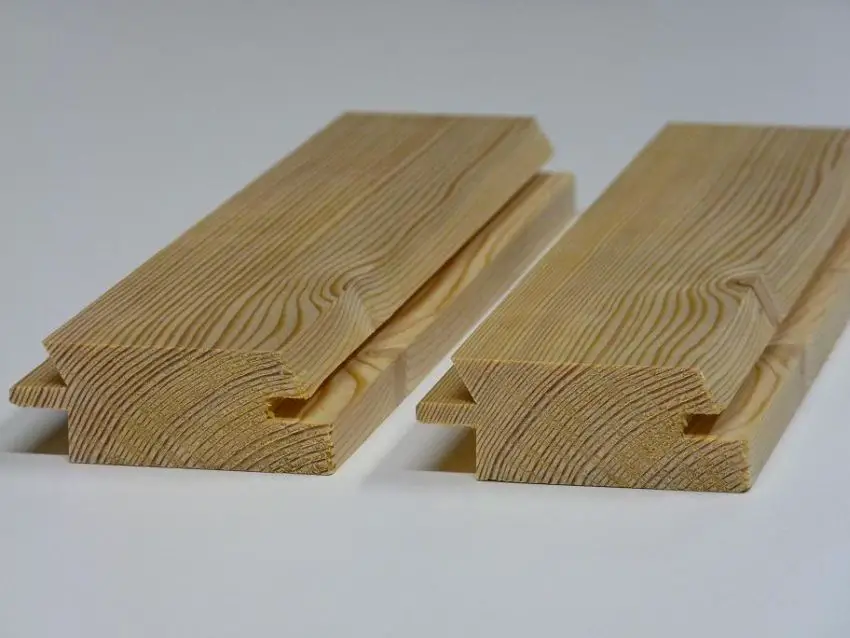
Installing a hardwood floor – the nut-feder joining system
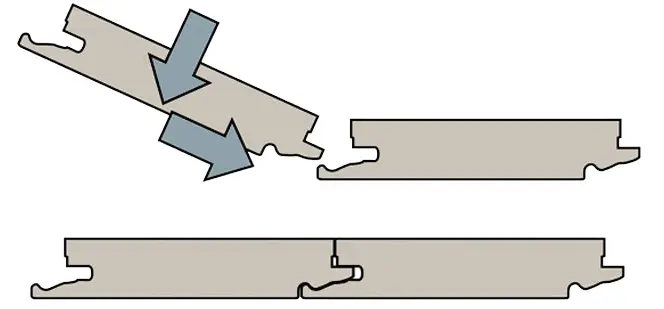
Installing a hardwood floor – the click joining system
Measure, draw lines and align the wood boards with care, using the first row as a guiding line. Make sure the boards are joined correctly to avoid unaesthetic gaps in the end. Always keep some extra boards in case of need of replacement.
Here is a video which gives you a broad view of how installing a hardwood floor should go:
Sources: Renovis.ro, Alfaparket.ro