How To Build A Pavilion Step By Step
Slowly, living spaces are moving outside where we seek the relaxing caress of nature. Wood pavilions are becoming more and more popular, turning into genuine epicenters of the family life over those long and hot summers when the garden entices with its scents, colors and coolness. In rain or heat, pavilions are the ideal space for respite, where you can catch up with the family and friends, away from other futile temptations of the modern times. Below are several technical details, accompanied by telling pictures, showing you how to build a pavilion step by step.
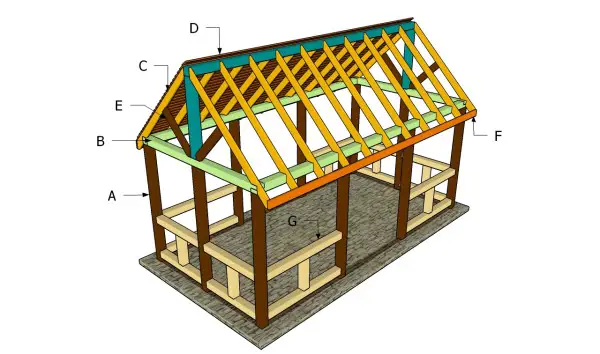
We have set our eyes on a project described on Myoutdoorplans.com showing how to a build a pavilion measuring 240/120 inches in length and width. We are not going to insist too much on technical details and the recommendation you need to all the time make accurate measurements, leaving the eloquent images guide you through the building process. First of all, you need to install the supporting pillars into place. In order to get a professional result, we recommend you to dig 2-3′ deep holes and pour concrete footings. If you don’t want to set the posts into concrete, you could use metal anchors.
How to build a pavilion step by step – the detailed plan
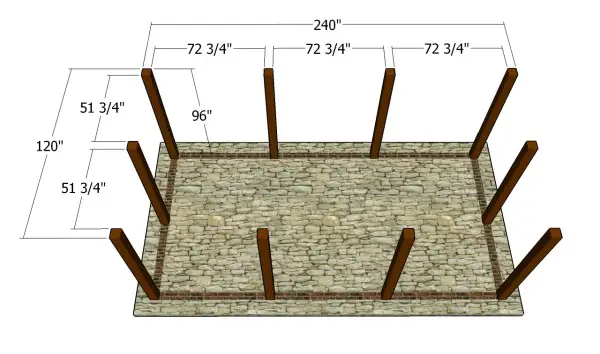
How to build a pavilion step by step – install the wooden posts
The next step of the woodworking project is to install the top rails. Place a spirit level on top of the tails, to see if they are perfectly horizontal. Install the ridge board then, fitting it into place with corner brackets and screws. Afterwards, you have to build the rafters for the outdoor pavilion. As you can notice in the image, you need to cut both ends of the rafters at 45 degrees, by using a circular saw with a sharp blade. In addition, you have to cut small notches inside the rafters, otherwise they won’t fit into place easily. Place them equally spaced
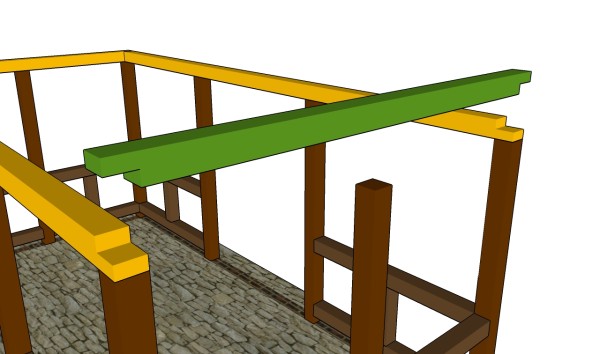
How to build a pavilion step by step – install the top rails
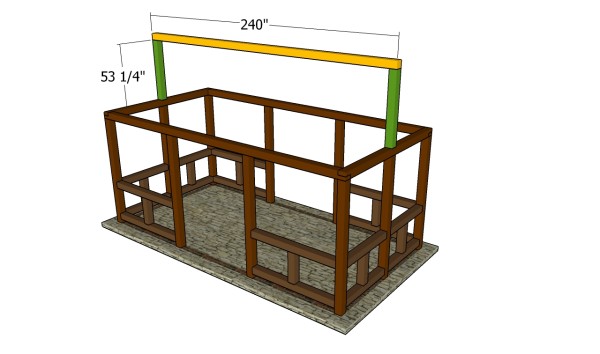
How to build a pavilion step by step – install the ridge board

How to build a pavilion step by step – install the rafters
Now, it’s time to install the roofing boards, using lumber which has been previously covered in protective paint. The boards should overlap at least several inches, in order to protect the structure from water damage. For a better looking pavilion, attach trims to the ends of the rafters. At the end of the building process, build the side railings for a final alluring outdoor space. Fill the gaps and the holes with a good wood putty. Let the compound to dry out properly, before sanding the whole wooden components and applying several coats of wood stain.
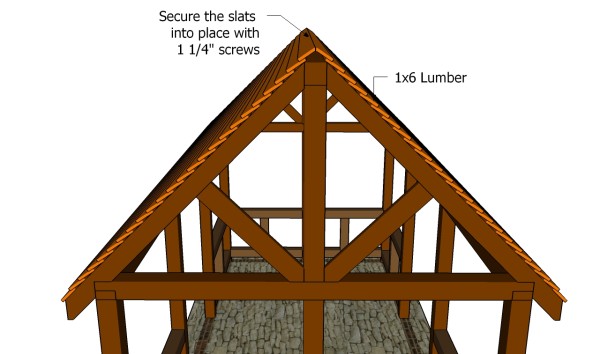
How to build a pavilion step by step – install the roofing boards
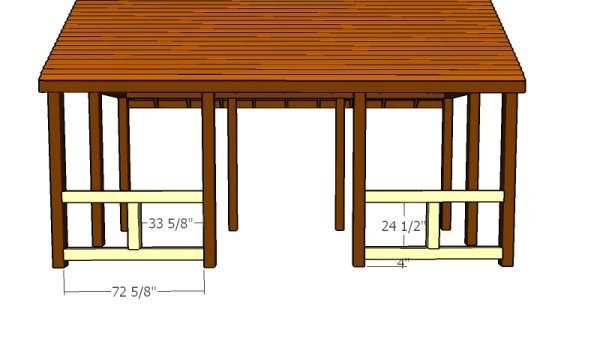
How to build a pavilion step by step – build the end railings
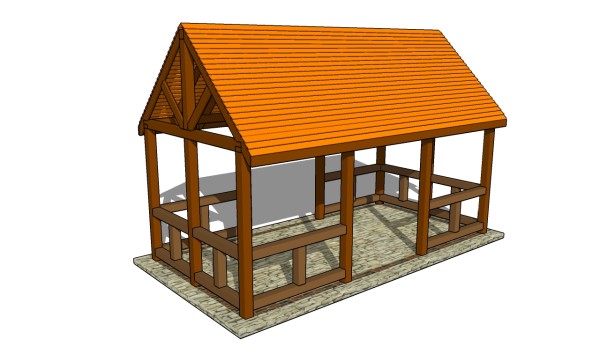
The pavilion is ready


I am looking for Pavilion Plans or a complete package as shown on your webpage for “How to Build a Pavillion Step by Step”. I have a space 18 ft long x 14 ft wide.