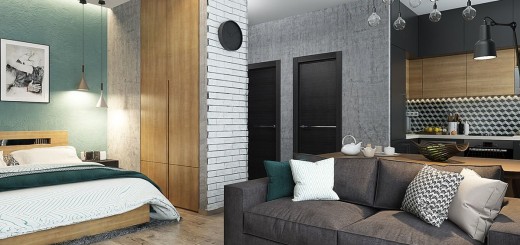
Renovating An Apartment – A Step By Step Guide
Things turn out best when carefully organized. Consequently, the renovation of an apartment, which is not an easy process and equally involves significant spending, should be done according to a well-structured plan so that you achieve the final set target. Otherwise, you will regret that in the absence of an easy to do planning that involves little time and a few steps put on paper, you have turned your budget upside down or end up not having that satisfaction of a well done thing. So here is a step by step guide to renovating an apartment, giving you a helpful overview.
It is easy to understand that everything starts with the most time and effort consuming things. Specifically, the process takes place from the inside out which is easy to understand. So, start by replacing electric wiring and plumbing because you won’t be able to do it later and, if you do it, you risk turning the whole renovation process upside down. After you have covered this step, move on to scraping surfaces (ceilings, walls and floors), removing the old paint or tile / tiles / flooring.
The next step is replacing the old windows and installing new ones, usually modern PVC windows. The offer here is so diverse that the best choice is looking for a perfect quality / price ratio. Do not shy from choosing quality windows, even if it involves extra costs, because these windows are a long term investment, with direct impact on your comfort (thermal and acoustic insulation). Going forward in the renovation process, the next step is removing the old doors, followed by installation of the new ones. Installing both the windows and the doors involves ensuing reparation works, otherwise inevitable.
After leveling everything around the new windows and doors, apply the first polishing plaster coat. The first layer is necessary for leveling walls and ceilings, while the second helps you make the final finishing work. To not experience later problems, wait for each of the layers of polishing plaster to dry thoroughly. Before applying the first layer of paint, put the primer on the respective surfaces (walls and ceilings). Priming ensures better adhesion of paint to the surface, increases paint durability, and provides additional protection for the material being painted.
Then apply the first coating of paint and make the necessary repairing, if the case. Finally, the second paint layer completes the chromatic design you chose for your interiors. Fit the end plugs and switches and then floorboards and plinths. In the bathroom or kitchen, the process unfolds differently, meaning that mounting sanitary ware is done after plating the walls and floors with ceramic tiles.